
I combined several patterns I found online to create my own pillowcase dress. I like this resulting set of instructions because it creates a really nice, finished armhole; the elastic across the front and back creates uniform gathering; and the ribbons stay put on the shoulders very well. It may or may not be an original pattern itself, but here's what I did. I'm pretty pleased with the results!

Materials Needed:
- One standard pillowcase OR one piece of 45"-wide fabric (lengths vary; see step 2 for more info)
- Two yards of 7/8" wide (or wider) grosgrain ribbon, cut into four equal lengths (for smaller sizes, 14" each is sufficient; larger sizes will use the entire 18" length)
- 1/2" yard of 1" wide elastic
- 1 yard of coordinating single-fold bias tape
- Coordinating thread
- (Optional) Additional beading, ribbon, cording, rick-rack, or other embellishments to adorn dress
Time to Complete: One night
Instructions:
- Purchase a pillowcase. (Or, as I did, find a scrap of 45" wide fabric from a past sewing project. With right sides together, stitch the sides together and sew a hem at the bottom. There is no need to finish the top edge at this time.)
- Cut your pillowcase, measuring from the hemmed dress bottom, upward. (You'll cut off the closed end of the pillowcase, or the unfinished edge of your scrap.) Use the list below to determine the cut length for your dress size.
- 6/9 months: 16"
- 12 months: 17.5"
- 18 months: 19.5"
- 2T: 21.5"
- 3T: 23"
- 4T: 24"
- 5/6: 26"
- 7/8: 28"
- On the unfinished edge, with the dress turned inside out, turn down 3/4". Press.
- Turn down an additional 1-1/4" on the same end. Press.
- With dress laying flat (seams on sides), cut J-shaped armholes out of the top corners. For smallest sizes (6/9 mo - 18 mo), use a J shape that is approximately 1-3/4"w x 2-1/4"h. For medium sizes (3T and under), use a J shape that is approximately 2-1/2"w x 3"h. For larger sizes, use a J shape that is approximately 3"w x 4"h. (You will cut off part of the tubing that was created in steps 3/4.)
- Open the last fold of the tubing.
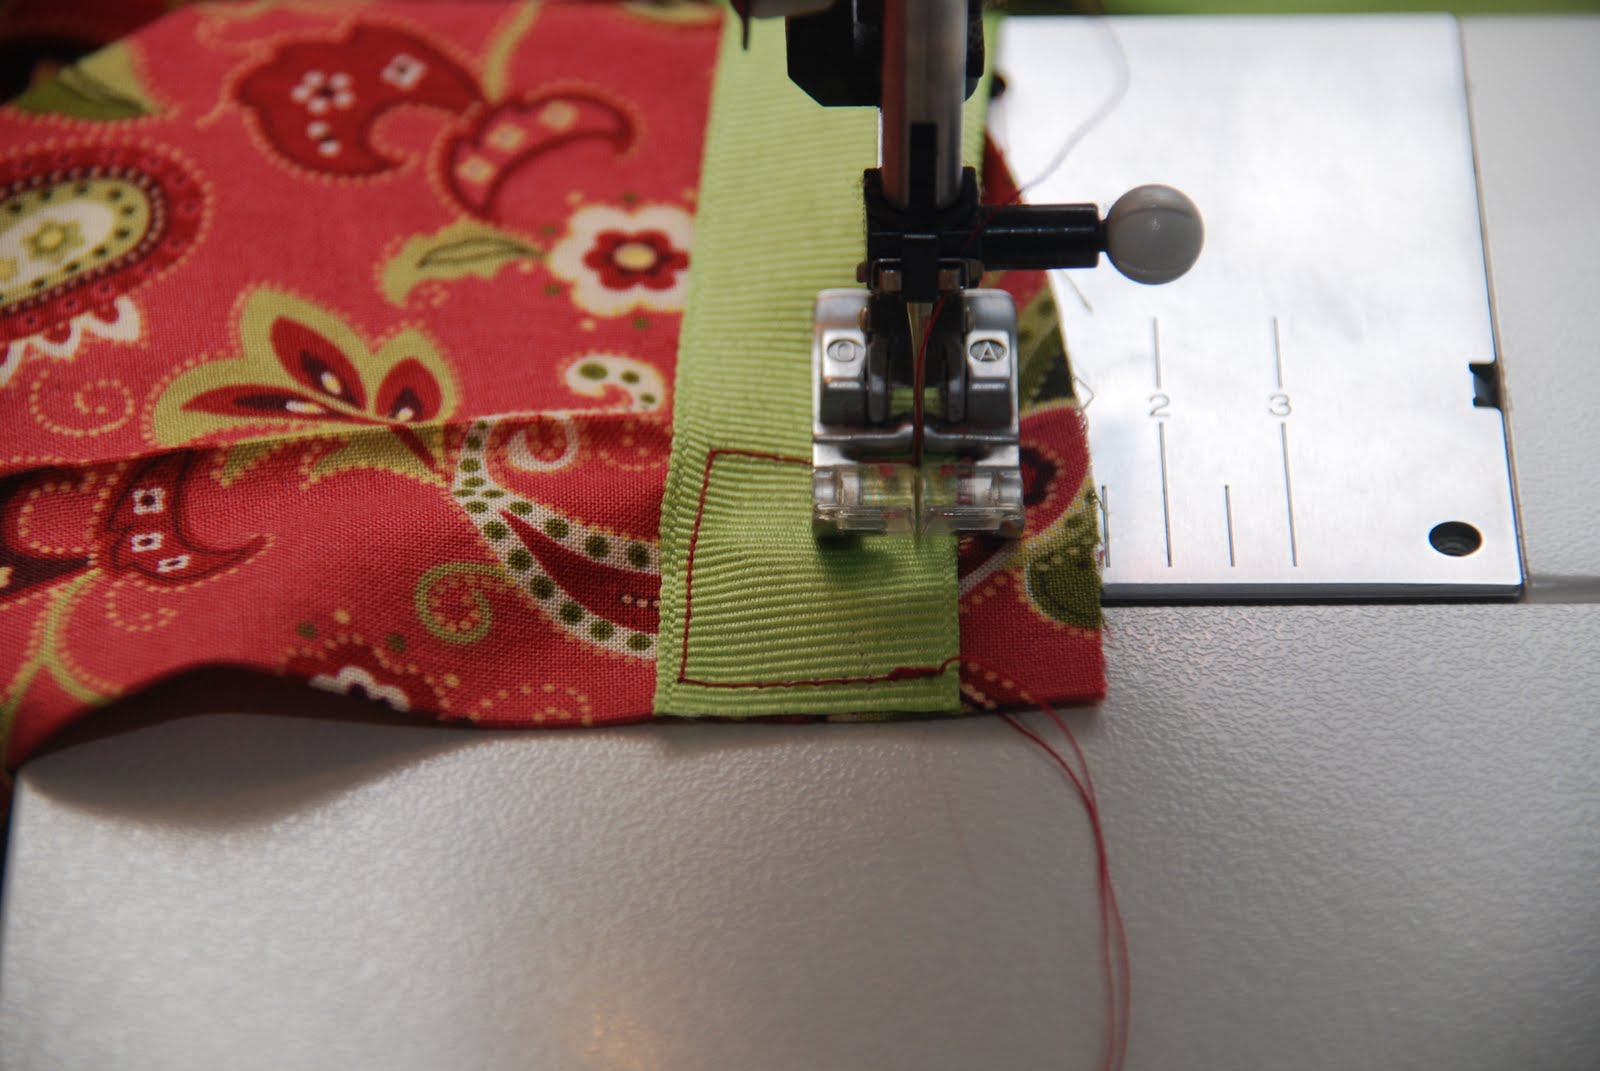
- Place and stitch the four strips of ribbon to the casing back, as shown. Place the right side of the ribbon face down on top of the opened tubing, with the length of the ribbon extending down the length of the dress. (To test your placement of the ribbon, pin the ribbon and refold the tubing/casing. The ribbon should extend upward to form the shoulder strap of the dress.) Leave 1/2" to the outside of each ribbon. Attach ribbon by stitching in a rectangle, to ensure greater durability.
- Fold the tubing back down. Stitch the tubing down on the front and back of the dress to form a casing (tube). Stitch as close to the edge of the tubing as you can without going off onto the dress front.
- Cut two pieces of 1" elastic, in the lengths shown below. (You can also measure your child to obtain the correct measurement. Measure across the chest. This will be the width of the top-most part of the dress.)
- 6/9 months, 12 months: 5"
- 2T, 3T: 6"
- 4T, 5/6: 7"
- 7/8: 8"
- Using a large safety pin as a guide, thread the elastic pieces down the front casing (tube). When the back end of the elastic is about 3/8" from the end of the casing, stitch it down. Stitch across the entire casing, catching the end of the elastic. You will want to reinforce this seam by stitching across three or four times. Continue threading elastic, stitching the other end of the elastic 3/8" from the other end of the casing.
- Repeat for the back casing.
- Cut a piece of single-fold bias tape for each of the armholes, allowing 1/2" extra on the ends of each armhole.
- Open up one side of the bias tape. Pin the right-side, open-side of the bias tape to the right side of the armhole. Remember to leave about 1/2" of extra bias tape on the end of each armhole.
- Stitch in the fold of the bias tape.
- Refold the bias tape. Turn the folded bias tape to the inside of the dress. Press, making sure to allow a little of the dress print to extend around the fold to the inside of the dress. (This keeps the bias tape from showing on the outside of the dress.)
- Open the recently pressed bias tape fold. Fold/tuck the extra ends of the bias tape down so that the resulting fold is flush with the top of the dress casing. Replace the bias tape fold. Stitch down the bias tape, along the armhole opening.
- Repeat steps 12-15 for the other armhole.
- To finish, tie front left shoulder ribbon to back left shoulder ribbon. Tie front right shoulder ribbon to back right should ribbon.
- Embellish the dress with trim, beading, embroidery, etc. as desired.


What about you? Have you made your own pillowcase dress? What tips can you share?
No comments:
Post a Comment