Showing posts with label Home Improvement. Show all posts

Monday, January 31, 2011

Project #14: Hang a Wall of Frames

When we moved into this house, I wasn't really blessed with a lot of time to decorate. Strike that. I didn't take the time to strategize how to decorate or to buy things that necessarily fit the house. (Comes with the territory when your on a tight money and time budget!)

So last year, I decided that the blank wall above the overstuffed chair in the den would be a great place to display some family photos. We really don't have a good place in our home, like a table top or other sort of display, to show off our darling dear ones, so this seemed like a sensible solution. I looked into getting some shelving to go along the wall but was overwhelmed by the high prices. It's just a strip of wood attached to the wall, right? Why on earth should it cost so much? Plus, I didn't have a lot of frames, so add in the cost of uniformly colored and matted frames, and this was going to be a budget drainer. Back to the drawing board.

I went through the small collection of frames we already had and found all the black ones. That was a start. Then I received a couple of frames for Christmas. After finding all the pictures I wanted to display, I finished off my framing at Walmart, where you can buy a matted 8x10 frame (for a 5x7 photo) or a matted 5x7 frame (for a 3x5 photo) for $3 each. Not bad. I wasn't as concerned about the frames not being the same style, so long as they were black with white mats.

After creating a general layout on the floor, I began hanging the frames with common picture-hanging hooks one by one, and I came up with this:

The problem now is that it's a little hard to expand the collection easily. Sure, you can just branch out and add another frame, but after a few additions, I realized that you have to be strategic in each of your placements. The other problem is that I scraped up the wall when hanging the frames, so there are lots of black scuffs on the wall surrounding the pictures and in between them.  I also decided that I would have liked them spaced a little farther apart. And also, I noticed that when people walked by heavy-footed or bumped a chair against the wall, some of the pictures would shift. I was constantly having to adjust the frames so that it didn't look like we lived in the Haunted Mansion at Disney World:


Well, the other day, my husband came home and asked if I'd seen the 3M Picture Hanging Strips, and he wondered if they'd be a good option for remounting our picture wall. With a few newly acquired pictures to hang, I was in!


I checked out the strips at the store and found that they were rated for different sizes/weights of frames. I purchased several "value" packs of size small and medium because our frames are rather light and fairly small. This was really the only cost, because I had all the other supplies on hand. It took me two nights because I had to let the paint dry, but it was very easy. Here's how I dismantled the old wall of frames and put up the new one:

Hang a Wall of Frames

Materials: 
  • Framed pictures or memorabilia
  • Fine finishing sanding block
  • Drywall repair tools and supplies (if needed)
  • Paint and supplies (if needed)
  • 3M Picture Hanging Strips (sized appropriate to your hangings)
Cost: Under $20
Time: Two Nights
Skill Level: Easy
Instructions:
  1. Remove all items from the wall. I found lots of scrapes, scuffs, and holes!
  2. Patch the holes with drywall tools. I could only find my wood putty at the time and not my drywall patch (which would have worked better), but I decided to go with what I had. Allow to dry/set.
  3. After filling the holes, use the sanding blocks to even out the wall surface.
  4. Using a paint roller, reapply paint to the repaired area. Allow to dry.
  5. Choose the appropriate 3M Picture Hanging Strips for each picture and afix to the back of each frame. Note that different size strips are rated for different frame weights. For instance, there are small strips that seem to be weighted for about 1 lb. each. Add two strips to hold a 2-lb. picture, etc. Medium strips seem to be weighted for 3 lbs. Check the back of your package for quantity and configuration suggestions. We got away with 1-2 small or large strips per frame. Not bad!
  6. Lay out the frames on a table or the floor to create a pattern for your hangings. I tried to align two edges of every picture frame with another frame. This gave me an organized, but not an overly symmetrical, matchy-matchy layout. I think it was a good strategy to adopt.
  7. One by one, afix the frames to the wall using the 3M strips according to manufacturer's instructions. I will say that you need to separate EACH STRIP before afixing it to the frame. If you just fold a pair of strips along the perforated line, then you won't be able to easily pull the frame off the wall once it's mounted.
Here's what I ended up with:


(There are two other projects in this picture...stay tuned for details!)

What's especially handy about this is that I can easily remove these frames and rearrange them without damaging the wall. So essentially I could have a different pattern every week if I wanted to! (I'm sure the 3M company would love me buying all those refill strips!) But, if I ever decide I want to do something completely different with the decor here, I can easily do so without disrupting any of the wall. Lesson learned! Plus, there's still plenty of room for more frames. I like it.

What about you? How have you creatively displayed your familiy photos? Have you ever used these 3M strips? Got any creative suggestions for making your arrangement truly unique?

Saturday, November 13, 2010

Project #10: Fix a Running Toilet (or Two!)

Yes, you read the post title correctly. TWO (!!) of our three toilets started running incessantly, allowing who knows how much water to run needlessly down the drain. The bathroom upstairs got so bad that we just shut the water off to it after our company left. We'd wake up in the middle of the night and hear it running mysteriously. It just got to be too much. On top of that, the flush handle was nearly impossible to push. Hmmm...Could those be related? And then the toilet in the half bath started running for long periods of time after flushing. Since we don't want to siphen all of our company to our master bath to use the restroom for the remainder of our years here in our home, it was time to roll up my sleeves and do some plumbing.

I started off by doing my research. I looked up "fixing a running toilet" in three locations. First I checked out this handy DIY guide my parents got us recently: DIY Know-How with Show-How by Julian Cassell, Peter Parham, and Theresa Coleman. Then I watched a how-to video from my personal DIY heroes, the guys over at This Old House. Finally, I checked out http://www.doityourself.com/ and found a helpful diagram and several troubleshooting tips.

After my research was complete, I decided to roll up my sleeves and see what I could do. (Times two.)
  1. First, I grabbed some old towels. I almost got started and didn't think about this! Good thing I did, because I got my hands a little wet! (Use old ones, especially if you use the bleach cleaning tablets like we do; no need to mess up good towels!)
  2. Next, I removed the lid on the back of the toilet. Most people automatically think toilets are full of dirty water, but the tank on the back is full of fresh water, so it's not as gross as you may think. Unless you have a really old toilet that hasn't been used in a long time, and water has sat stagnantly in the holding tank, the water should be fairly clean.
  3. Turn the water to the toilet on (if it's been shut off).
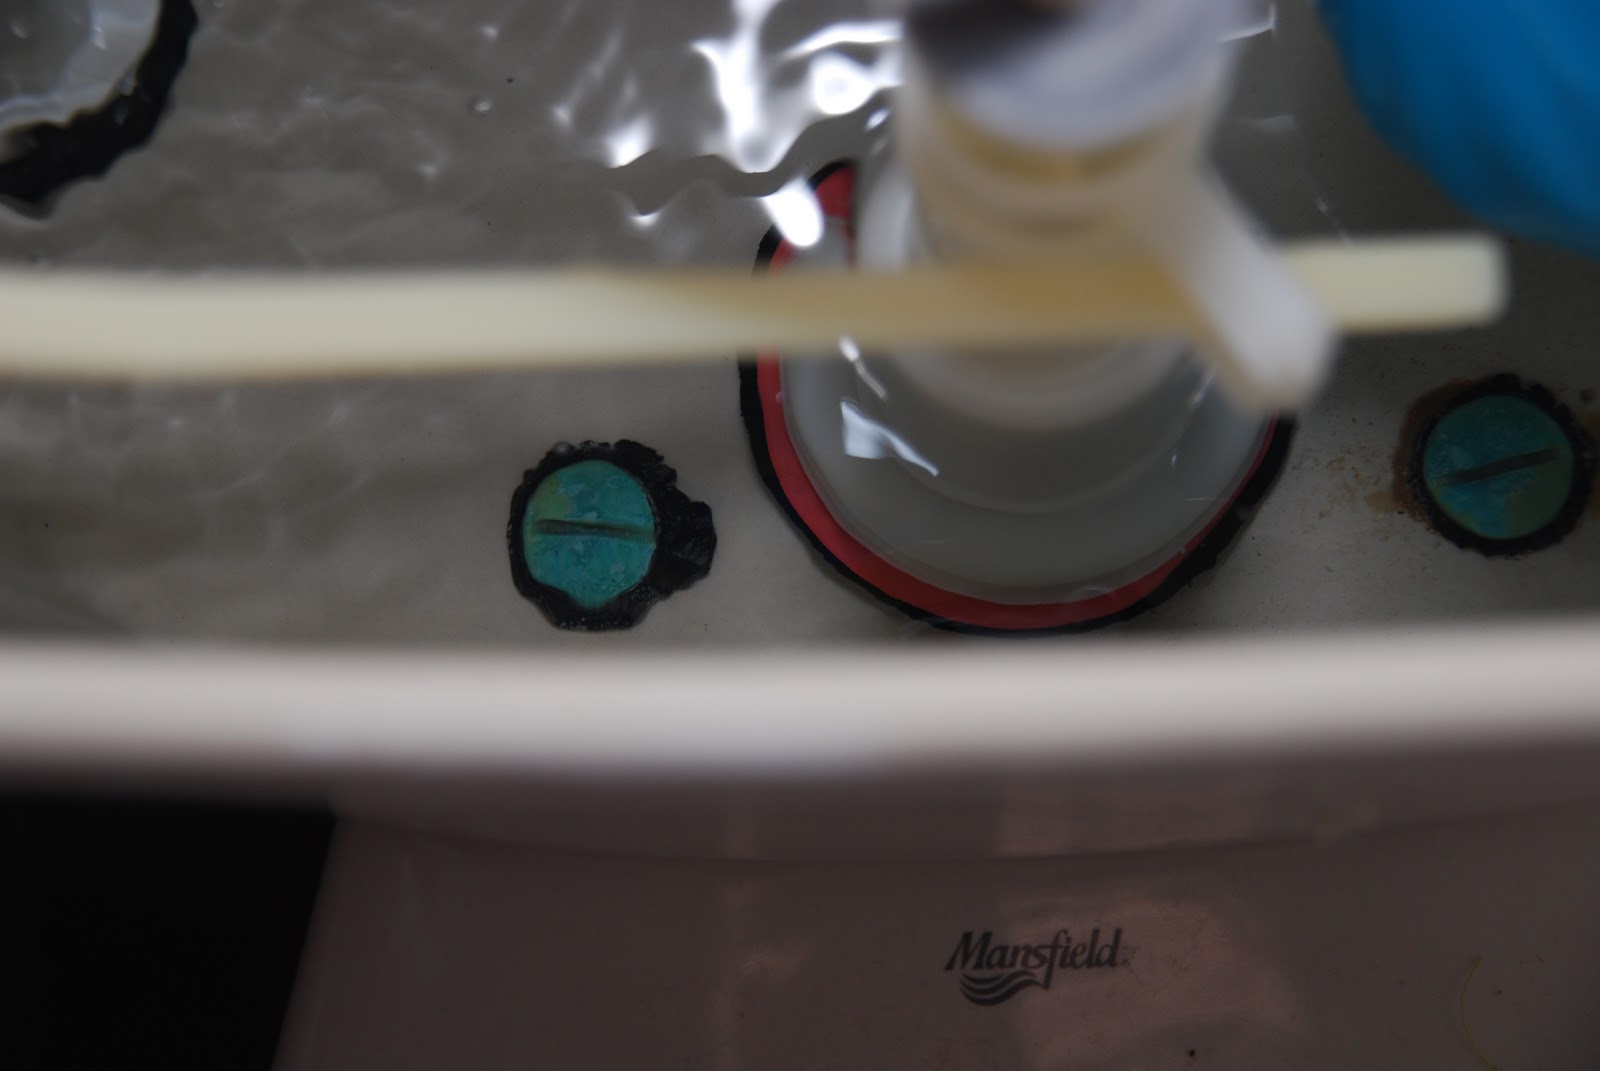
  4. Check the chain to make sure it isn't twisted. The first thing I noticed is that my toilet was different than the one in the diagram. Namely, there was no chain. (I have Mansfield 180 toilets in all three baths.) Water came in through the left-hand column, and drained out the valved hole beneath the center column. The float arm was attached to the left column, but no chain connected it to the valve. Step complete. On to the next test.
  5. Check to see if water is collecting in the float (blue in pciture above). My research told me that water-laden floats needed to be replaced. Mine was empty and thus, not in need of replacement. Step complete. Onward to the next checkpoint.
  6. Slightly bend the float arm downward so that the float hangs slightly lower than before. I knew that this was a promising step in the half bath because I had been able to stop the toilet from running after a flush by slightly lifting this arm. Sure enough, after bending the arm, I gave it a flush, and the running stopped immediately--not 30 minutes later. Success with the half bath! Toilet lid back on, I headed to the kids'/guest bath. Unfortunately, steps 4 through 6 didn't work this time around. After flushing, I could still hear a trickle of water, meaning water was getting out of the tank somehow--presumably through that center column. And sure enough, in less than 30 seconds, the toilet maneuvered a "half-flush" to force more water back into the tank. The trickle continued.
  7. Ensure the valve seal is positioned correctly. At this point, I noticed that the red valve seal (a round O-shaped piece of rubber underneath the center column) was unevenly visible around the base of the center column.

    So I lifted the column (causing a long flush) and pulled up the rubber. It was a bit dirty, so I rubbed it clean, and repositioned it evenly around the valve opening, snapping it into position. I immediately noticed that it connected better and was positioned more symmetrically around the valve. After testing the flush (which was MUCH easier--additional problem solved!), the toilet tank filled and stopped running. AND, the trickle was gone! Success!
  8. Replace toilet lid and bask in your new-found plumbing abilities. (Optional) Call husband to brag. (He'll be so proud.)
This whole ordeal (two toilets) took me less than 30 minutes to complete, didn't require any tools or materials, and, most impressively, didn't cost me a thing. If I'd known how easy this would be, I'd have fixed this problem weeks ago. Now I know. I realize I was lucky and didn't have to replace any parts, as some guides mentioned. I may have to do that someday, but for now, I'll try these simple steps FIRST to see if I can fix the problem easily.

I feel kind of empowered by my new knowledge. What about you? Have you tried any home repair recently that you'd never tried before? Ever worked on a running toilet? Got any other helpful tips?

Friday, October 29, 2010

Project #7: Clean Out the Clothes

During our last move, we didn't have a lot of time to go through our closets before we packed or after we unpacked. Needless to say, we had accumulated a great deal of clothes that had either gone out of style, seen their better days, or no longer fit. For some time, we kept two giant moving boxes in our room and just tossed stuff in them (eventually on top of them) when it met one of these qualifications. We had been putting off taking them to Goodwill because we wanted to itemize them for tax purposes.

Well, I had just about had it with the two boxes of clothes. I had decided to forget about the writeoff in favor of less clutter. Except the boxes had gotten so big that me and my pregnant self couldn't lift the boxes any longer. So something had to be done.

I started to consider my options, and I decided to take a couple of routes. Here's what I did:
  1. Dump out all the clothes on the floor. I had to see what I had in order to make any progress.
  2. Pick out items that could be consigned. I have never done this before, but the process was fairly painless and carefree. My clothes were already clean and folded; I just gave them a quick press and a hanger before running them to my consignment appointment. I placed 20 items in the store for the fall; we'll see in January how they did. The drop-off process took all of five minutes! I've got another stack going to drop off for the spring sale. (Consignors usually limit how many items you can drop off during each season.)
  3. Grab the worn-out items and throw them in a trash bin! If I wouldn't wear it in its current condition, why would anyone else? No need to donate junk that someone else is going to have to weed through.
  4. Donate everything else! Fold and pack items in small, easily manageable boxes or bags that can be easily lifted in and out of your car.
  5. Drop everything off at its final destination!
In calling local consignment shops, I was disappointed to find that men's clothes aren't accepted by any of my stores. Most specialized in children's clothing, and with one little girl and another one on the way, I can't see getting rid of any of that yet. But one day, I'll have plenty to consign! And bonus: the local consignment shops donate all items that don't sell at the end of your sale period, so there's no need to go pick up leftovers and drive them over to Goodwill. Just stop by and pick up your check!

I think I waited a little too long to get to this project. I'm going to try to be more devoted to this moving forward. For this reason, I placed two large, labeled bins in the floor of my closet: (1) Donate and (2) Sell. Now when I (or anyone else) comes across something that needs to go, we'll put the item directly in the appropriate box, folded and ready to go. When a box is full, I'll deal with it individually instead of having to repeat steps 1-5 above. And now, clothing that's just had it goes straight to the trash can.

Whew! I already feel better. And my room looks better. At least that corner of it.

How often do you go through your clothes? Do you have any way to turn the unwanted items into a bit of extra cash? Ever had any luck selling at yard sales? Do share!

Jennifer

Sunday, October 10, 2010

Project #6: Make/Sew Outdoor Cushions

When it comes to outdoor furniture, the difference between relaxing and total comfort comes down to a nice cushion. When I started looking for cushions for my new outdoor furniture, I was disappointed by the selection. Some were too pricey. Some were too flimsy. Sizing seemed to be a problem, too. My custom-built chair, for instance, took a 24"x24" seat cushion. I couldn't find that size anywhere in local stores (or even online!).

Most cushions in stores were quite colorful, but just not what I envisioned for my neutral back porch. I'm trying to stick to a chocolate and tan color scheme so that I can easily throw in splashes of color on a whim, without breaking the bank.
  • Here's our Cabot semi-transparent deck stain, in Cordovan Brown:
  • Here's our rug from Home Depot:
    Natco Noble Beige/Chocolate 5 Ft. 3 In. x 7 Ft. 4 In. Indoor/Outdoor Area Rug 3012.53.55 Image1
  • Here's a swatch (Rhino outdoor, khaki) of our curtains from http://www.fabric.com/:
    Rhino Outdoor Khaki
  • And I had already picked my inspiration "color" fabric for the time being. No introducing more colors or patterns than these (at least for now)! Here's the two coordinating fabrics (Richloom Coventry Spa and Covestripe Spa) we'll use--very sparingly--for throw pillows, from http://www.fabric.com/:
    Richloom Indoor/Outdoor Coventry SpaRichloom Indoor/Outdoor Covestripe Spa
So you can see that patterned retail cushions were overwhelmingly TOO colorful for this purpose. (Maybe I'm just too picky or pre-planned?) And then some cushions had longevity concerns--do people really replace their cushions every year or two?!? Why would I spend that much money every year or two?

Well, being the project-craver that I am, I decided to make my own. After all, if you can't find exactly what you're looking for, just do it yourself. I ordered more Rhino khaki fabric, and started looking for foam. Foam is notorious for rotting, mildewing, and holding water--not what you want to hear when you're making outdoor cushions. So I opted to go with Nu-Foam, which is totally stain and mildew proof. The manufacturer recommends using this foam for boat cushions. I was sold. Luckily, my local cloth stores sold the foam by the yard. I was looking for 4" foam, but they only had 2" by the yard, so I purchased two slabs, cut them with an electric knife (a slightly laborious job), and glued them together. I also bought some extra thick batting to wrap the foam in to give it a little extra "cush." Nu-Foam is rather stiff, but seems to hold its shape well, so it just needed a tad extra help.

Next I set out to design my cushion. I didn't have a pattern. Instead, I sketched out what I was looking for: a square cushion with a zippered back so that I could remove, clean, or repair the cover (or contents) as needed. First, I made several yards of piping, using cording and 1-1/2" strips of fabric. Then, I cut one strip of fabric 22" long and 5" tall. I cut this in half length-wise and installed a 22" utility zipper. Next, I cut an 80" long and 5" tall piece that would wrap around the remaining sizes of the cushion and overlap (with ends folded under) the back zipper panel on each end (just to give it a finished look). Then I cut two large squares that were 25"x25" each. Finally, I sewed all the pieces together (5/8" seam allowance): top to sides (right sides together), with piping sandwiched in between, and then bottom to sides (right sides together), with piping sandwiched in between.

I was really pleased with the resulting cushions. They are exactly what I wanted. Though not quite as "cushy" as I would have ultimately liked, I know that these materials will last a long time and hold up to the weather that they will encounter while residing on my back porch.

These cushions went together quite well. Lining up the two squares is crucial, though, so that your cushion doesn't look slightly-twisted (a la an Oreo cookie)! Be sure to pin! I found ready-made 22"x22" square Nu-Foam cushions at the cloth store, which will make future electric knife episodes non existent. Plus, it will be cheaper, because I can use a coupon on each of these cushions, or buy them as they come on sale. I purchased my zippers on sale, and even got a great discount at Fabric.com when ordering my outdoor weather-proof fabric (plus free shipping on orders over $35). So all in all, I believe you could make each cushion for about $25 if you really stick to your guns and watch your spending. If that sounds steep, let me assure you that it paled in comparison to some cushions I perused at designer stores. And, I'd much rather pay a little more now to get a cushion that will last a while, with proper care. It took me one night to design my "pattern" and cut the fabric, and another night to sew two cushions! I'll call it a two-nighter.

What tricks and tips have you learned while making outdoor cushions? Can you recommend other materials that have worked well? How do you preserve your cushions so that you don't have to replace them every year? I'd love to hear/see your cushion stories!

Jennifer

Monday, September 27, 2010

Project #3: Hang a Screen Door

I have to admit, I'm ambitious. Thanks to Brandon at my neighborhood Home Depot, who spent over two hours walking me through how to do this project and gathering all my supplies for me, I walked out of the store thinking I could build a house (not to mention hang a measely screen door)!

Let's back up a moment...

Last year, we discovered water leaking in our back door. The back door opens up onto a deck. Previously, we had our grill and patio furniture up there, as well as a summer patio garden (where it was out of reach of local deer and squirrels). But to be honest, we rarely used the space.

In looking at solutions to our leaking problem, we considered building a small 4'x4' overhang or installing a canvas overhang. But when the wind blew the rain, we knew we'd still experience leaking around the bottom of the door. We'd always wanted a screened in back porch, so we got estimates, and bit the bullet. But we did it on a budget. You see, we didn't want to wipe our savings clean to build this new screened-in room, so we opted to start by building just the roof. It was the cheapest option, and allowed us to finish the painting ceiling, door, electrical, and screens in our own time, when the budget allowed.

Construction ensued in the fall, and I (we) couldn't be more pleased with the results. From the outside, it looked completely finished, with soffits, (matching) painted siding, and (matching) shingles. On the inside, it was roughed in, but water was no longer hitting the back door and leaking in, so we couldn't be happier. The bonus was that I was able to move the old furniture to the patio below, purchase an indoor/outdoor carpet to put down, and the deck became our new playroom during the day. We spend hours outside each day playing in the fresh air and breeze. It's wonderful, and worth every penny.

In the early spring, we had the deck stained and trim painted. We had planned to do it ourselves, but looking back, it took a professional three weeks to do a pristine job (just as we would have done it), and so it was worth every penny to contract that work out. In late spring, we paid an electrician to install two flood lights off the corners of the room, wire the ceiling for a ceiling fan, and fix the light switch to accommodate all the new functionality. I moved an old light fixture to the back porch, in the spot where an original floodlight had resided.

And then it was time to begin screening things in. We are constantly sitting and playing on our back porch, so keeping the little one from running down the open staircase was a challenge. Srike that. It was making me a nervous wreck. So I opted to put up a screen door.

I started with a somewhat warped door opening, which apparently isn't that uncommon in building. So I had to rough-in my door frame. Armed with measurements, shims, scrap wood, and a level, I blocked in around the existing opening and made a square, level frame for the new door. Check out all the added blocks below!


That was the hardest part. I purchased a white vinyl (read that "NO PAINTING REQUIRED!") screen door for a reasonable $70, with coupon, from my local home improvement store. It came with spring-loaded hinges and some standard, simple door hardware. I opted to add a brushed nickel sliding flat lock and a brushed nickel stationary door knob, which match existing hardware on the back door and were much sturdier (and likely to uphold well to the constant tugging of a toddler). Voila!


At this point, I'm waiting for the pressure treated wood to cure. In a couple of months, I'll prime and paint it, and no one will know how "off" the door opening used to be!

I'm rating this moderately difficult because (1) it required more than one person (believe me, with all the hammering and leveling, I needed a second set of hands--hats off to my wonderful dad!), and (2) it took a little bit of knowledge about building, leveling, and cutting.

Costs? This one set me back about $125, which doesn't include scrap wood I had lying around, and the few nails and screws I already had on hand. Not bad for some peace of mind while my little one plays on the deck.

Now, on to screening in the rest of the back porch!