Showing posts with label Cost: $20 - $50. Show all posts

Sunday, October 10, 2010

Project #6: Make/Sew Outdoor Cushions

When it comes to outdoor furniture, the difference between relaxing and total comfort comes down to a nice cushion. When I started looking for cushions for my new outdoor furniture, I was disappointed by the selection. Some were too pricey. Some were too flimsy. Sizing seemed to be a problem, too. My custom-built chair, for instance, took a 24"x24" seat cushion. I couldn't find that size anywhere in local stores (or even online!).

Most cushions in stores were quite colorful, but just not what I envisioned for my neutral back porch. I'm trying to stick to a chocolate and tan color scheme so that I can easily throw in splashes of color on a whim, without breaking the bank.
  • Here's our Cabot semi-transparent deck stain, in Cordovan Brown:
  • Here's our rug from Home Depot:
    Natco Noble Beige/Chocolate 5 Ft. 3 In. x 7 Ft. 4 In. Indoor/Outdoor Area Rug 3012.53.55 Image1
  • Here's a swatch (Rhino outdoor, khaki) of our curtains from http://www.fabric.com/:
    Rhino Outdoor Khaki
  • And I had already picked my inspiration "color" fabric for the time being. No introducing more colors or patterns than these (at least for now)! Here's the two coordinating fabrics (Richloom Coventry Spa and Covestripe Spa) we'll use--very sparingly--for throw pillows, from http://www.fabric.com/:
    Richloom Indoor/Outdoor Coventry SpaRichloom Indoor/Outdoor Covestripe Spa
So you can see that patterned retail cushions were overwhelmingly TOO colorful for this purpose. (Maybe I'm just too picky or pre-planned?) And then some cushions had longevity concerns--do people really replace their cushions every year or two?!? Why would I spend that much money every year or two?

Well, being the project-craver that I am, I decided to make my own. After all, if you can't find exactly what you're looking for, just do it yourself. I ordered more Rhino khaki fabric, and started looking for foam. Foam is notorious for rotting, mildewing, and holding water--not what you want to hear when you're making outdoor cushions. So I opted to go with Nu-Foam, which is totally stain and mildew proof. The manufacturer recommends using this foam for boat cushions. I was sold. Luckily, my local cloth stores sold the foam by the yard. I was looking for 4" foam, but they only had 2" by the yard, so I purchased two slabs, cut them with an electric knife (a slightly laborious job), and glued them together. I also bought some extra thick batting to wrap the foam in to give it a little extra "cush." Nu-Foam is rather stiff, but seems to hold its shape well, so it just needed a tad extra help.

Next I set out to design my cushion. I didn't have a pattern. Instead, I sketched out what I was looking for: a square cushion with a zippered back so that I could remove, clean, or repair the cover (or contents) as needed. First, I made several yards of piping, using cording and 1-1/2" strips of fabric. Then, I cut one strip of fabric 22" long and 5" tall. I cut this in half length-wise and installed a 22" utility zipper. Next, I cut an 80" long and 5" tall piece that would wrap around the remaining sizes of the cushion and overlap (with ends folded under) the back zipper panel on each end (just to give it a finished look). Then I cut two large squares that were 25"x25" each. Finally, I sewed all the pieces together (5/8" seam allowance): top to sides (right sides together), with piping sandwiched in between, and then bottom to sides (right sides together), with piping sandwiched in between.

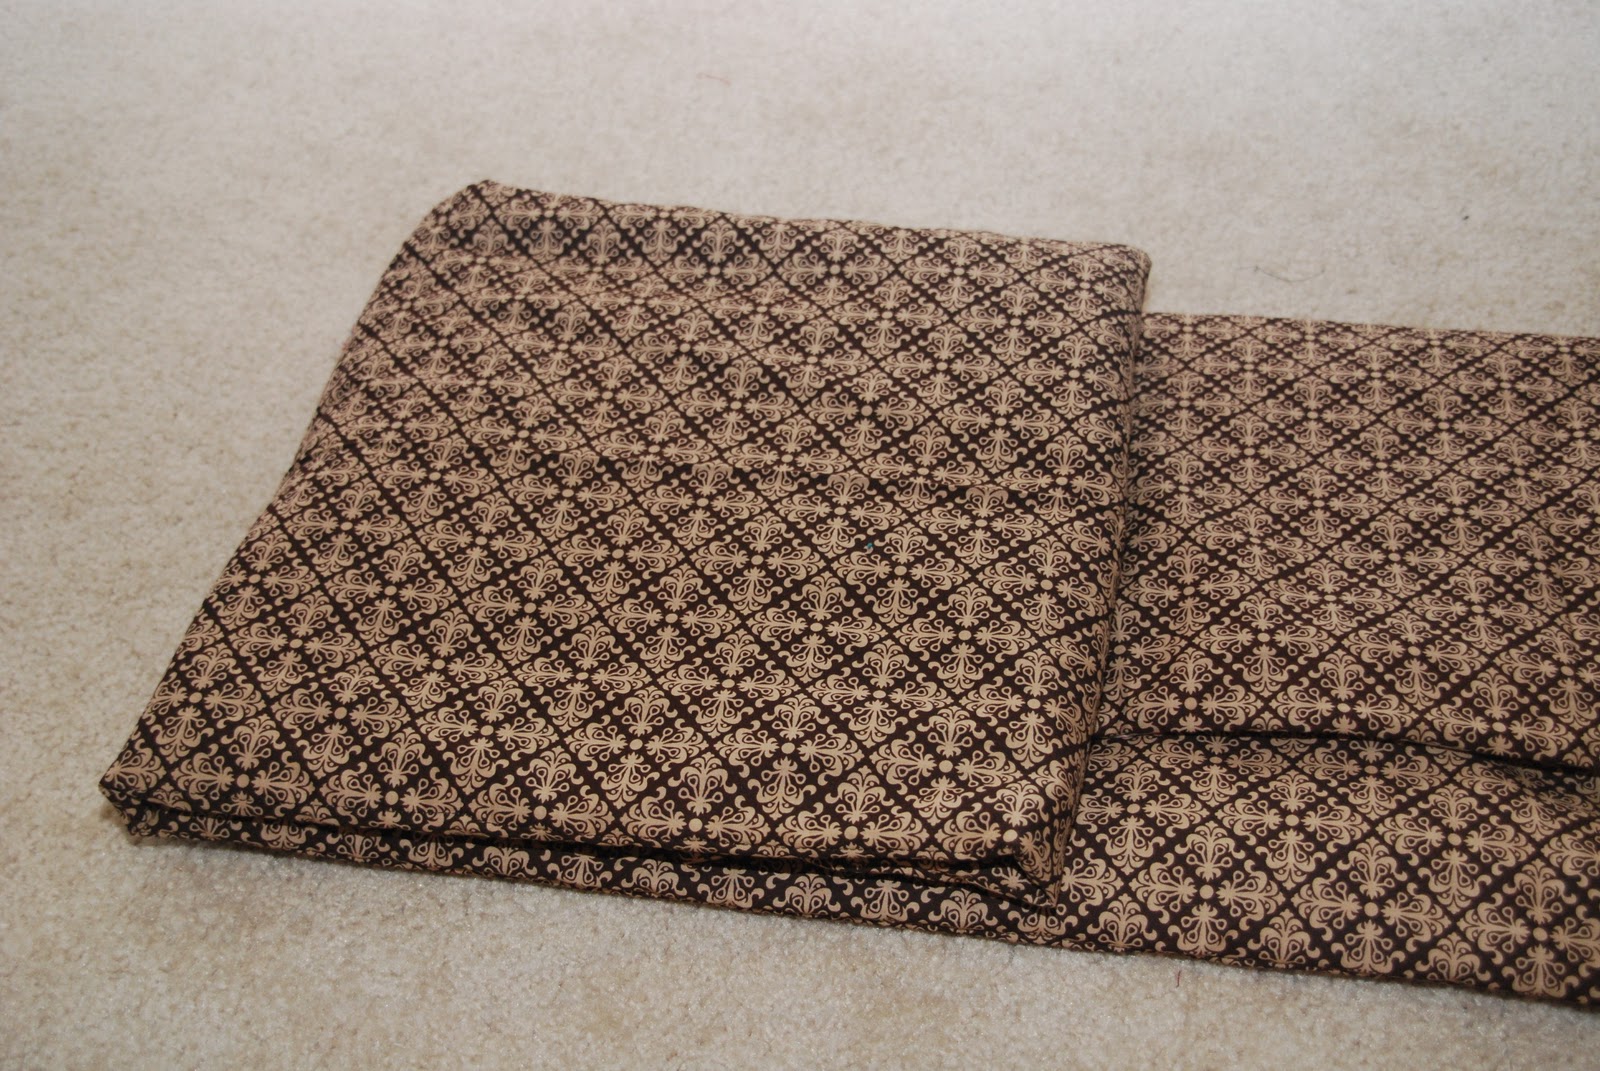
I was really pleased with the resulting cushions. They are exactly what I wanted. Though not quite as "cushy" as I would have ultimately liked, I know that these materials will last a long time and hold up to the weather that they will encounter while residing on my back porch.

These cushions went together quite well. Lining up the two squares is crucial, though, so that your cushion doesn't look slightly-twisted (a la an Oreo cookie)! Be sure to pin! I found ready-made 22"x22" square Nu-Foam cushions at the cloth store, which will make future electric knife episodes non existent. Plus, it will be cheaper, because I can use a coupon on each of these cushions, or buy them as they come on sale. I purchased my zippers on sale, and even got a great discount at Fabric.com when ordering my outdoor weather-proof fabric (plus free shipping on orders over $35). So all in all, I believe you could make each cushion for about $25 if you really stick to your guns and watch your spending. If that sounds steep, let me assure you that it paled in comparison to some cushions I perused at designer stores. And, I'd much rather pay a little more now to get a cushion that will last a while, with proper care. It took me one night to design my "pattern" and cut the fabric, and another night to sew two cushions! I'll call it a two-nighter.

What tricks and tips have you learned while making outdoor cushions? Can you recommend other materials that have worked well? How do you preserve your cushions so that you don't have to replace them every year? I'd love to hear/see your cushion stories!

Jennifer

Monday, September 6, 2010

Project #2: Sew a Pillow Quilt (Quillow Pilt!)

When I was in elementary school, my grandmother made all seven of her grandkids pillow quilts for Christmas one year. They came as cute pillows with decorated fronts. These pillows unfolded into a cozy, soft blanket. And the bonus was that the pillow "pocket" served as a great foot warmer in cooler weather.


I took my pillow quilt with me everywhere--on road trips, on the couch, etc. And I still have and use it today. When we were younger, my brother and I often got tongue-tied trying to say "pillow quilt" and it often came out as "quillow pilt." Well, the name stuck in our family! We all have our own quillow pilts now and love them. They make perfect gifts for all ages. In fact, this year, all my nieces and nephews are getting handmade pillow quilts from me! I'd better get busy!

I made my second project by night this weekend. It's the first of my pillow quilts--one for my daughter. I think I could have done it in a single night, except I needed some extra supplies, and of course the cloth store isn't open at 11:00 p.m. I also think the pillow front took me more time, as I tried to decide exactly what to put on it. If I'd had an idea going into the project of what it was to look like, I probably wouldn't have wasted so much time just playing around and trying different things.

I'm rating this project as easy. The only real difficulty  in this project is not the sewing itself. It arises in dealing with sewing such a large piece of fabric. It also stems from the level of complexity you choose to take on with decorating the front of your pillow. Otherwise, this is a very easy, straight-forward project! Enjoy, and be sure to share your own experiences and pictures making your "quillow pilts!"

Sew a Pillow Quilt

Materials Needed:
  • 2-1/2" yards of 45”-wide, 100% cotton fabric ("Fabric X")
  • 2-1/2" yards of coordinating 45”-wide, 100% cotton fabric ("Fabric Y")
  • 2-1/2" yards 45"-wide (or wider) quilter's batting (light or medium weight)
  • Coordinating thread
  • (Optional) Remnants, ribbon, rick rack, buttons, etc. for decorating front of pillow
Cost: $20 - $30
Time to Complete: Two Nights
Level of Difficulty: Easy
Instructions:
  1. Cut the following pieces:
    • 2 yards Fabric X (finished size: 72” x 45”)
    • 2 yards Fabric Y (finished size: 72” x 45”)
    • 2 yards batting (finished size: 72” x 45”)
    • 18" x 18" Fabric X
    • 18" x 18" Fabric Y
    • 18" x 18" batting
  2. (Optional) Decorate the 18" x 18" piece of Fabric X as desired. Note that larger items should not be placed within the outer 2" of the square for seam allowances. (I appliqued a letter on this one using the same technique as described in this post about appliquing a t-shirt. I simply used MS Word to print the outline of a letter on an 8.5" x 11" letter sheet of paper, which became my pattern.)
  3. Place the 18" x 18" piece of Fabric X against the 18" x 18" piece of Fabric Y, with right sides together. Place the 18" x 18" piece of batting on the back of Fabric Y. Match and pin all edges.
  4. Sew all thicknesses together, using a 5/8" seam and leaving a 6" gap at the middle of the top edge of the pillow. (I used my serger in this picture, which made the seams a lot less bulky in the end!)
  5. Turn right sides out. Press, easing seam out along edges.
  6. Press under 5/8" of Fabric X and Fabric Y along 6" gap. Tuck batting underneath one fold of fabric. Pin. Edge stitch to close.
  7. Place the 2 yards of Fabric X against the 2 yards of Fabric Y, with right sides together. Place the 2 yards of batting on the back of Fabric Y. Match and pin all edges.
  8. Sew all thicknesses together, using a 5/8" seam and leaving a 10" gap at the middle of one of the short ends of the quilt.
  9. Turn right sides out. Press, easing seam out along edges.
  10. Press under 5/8" of Fabric X and Fabric Y along 10" gap. Tuck batting underneath one fold of fabric. Pin. Edge stitch to close.
  11. To quilt blanket:
    • Place the pillow, face down, on the right side of Fabric Y. (Fabric Y should be showing on the back of the pillow.) The pillow should be centered, left to right, on the blanket and flush left with the end that was edge stitched (see Step 10 above). The top of the pillow design should be along the edge-stitched edge of the blanket. Pin.
    • Measure the distance from the edge of the pillow to the outer edge of the blanket. Add 1/4". This is your quilting distance.
    • Measure, mark, and pin (through all thicknesses) the quilting distance down both sides (long edges) of the blanket. This will result in two stitching guides.
    • Stitch two straight lines along the stitching guides from the top of the blanket (including on top of the pillow) to the bottom (lengthwise). You may want to use a slightly longer stitch length to compensate for the extra thickness.
  12. Sew top of pillow to edge of blanket, using a 1/4" seam allowance. The bottom of the pillow (facing toward blanket center) should not be sewn to the blanket.
  13. To fold pillow quilt:
    • Turn blanket pillow-side down. Fold blanket in thirds lengthwise, along stitching.
    • Fold over about 8" of blanket (non-pillow end).
    • Fold blanket into squares (roughly thirds) towards pillow end.


    • Tuck blanket into pillow and fluff to form.
UPDATE: And now I've made five pillow quilts for nieces and nephews for Christmas. Check out these beautiful fabrics from JoAnn's, Walmart, and Hancock's:


All were decorated using the applique technique mentioned earlier.  I can't wait to give them at Christmas!